Install CafeServer
Installing CafeServer takes a few minutes. Do it on the café server itself.
Steps
- Copy
CafeServer.exe(provided by your dealer) to the server. - Right-click the file and choose Run as administrator.
- The CafeServer setup window opens (it is in Vietnamese). Fill in:
- CafeID: your café ID.
- CafePwd / mật khẩu: the license password that comes with the CafeID.
- Mật khẩu web (web password): the password for the Console — choose your own, different from CafePwd.
- Thư mục cài (install folder): where the CafeServer program goes (keep the suggestion or pick another folder).
- Click Cài đặt (Install). CafeServer installs itself as a background service that starts with Windows and creates Desktop shortcuts.
- The Console opens. You manage everything from there.
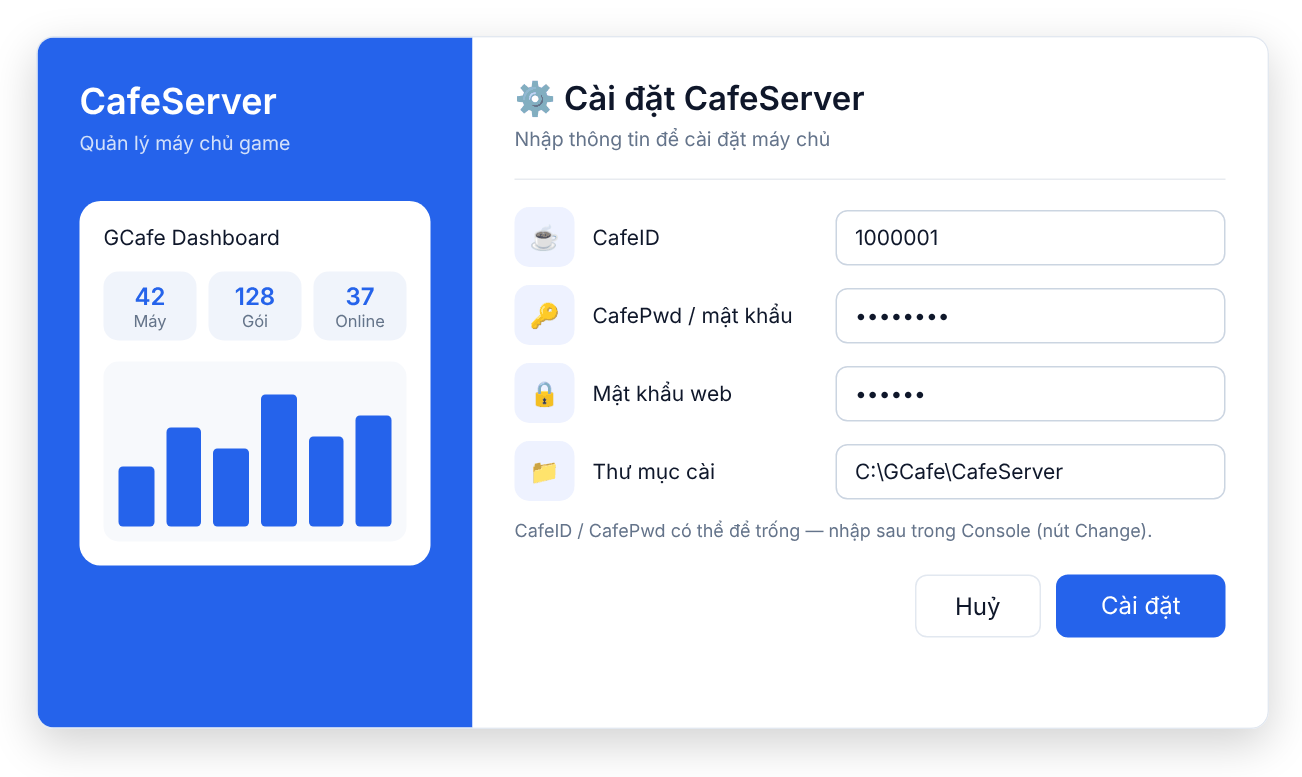
The setup window (illustration; the values are examples).
💡 Tip: No CafeID / CafePwd yet? Leave both boxes empty and click Install. Then open the Console and click Change at the top to enter them, or register a new CafeID.
What appears on the Desktop
- GCaféUpdate Dashboard: opens the CafeServer Console.
- CafeConsole: the companion management tool (only created if it is not there yet).
Deleted a shortcut by mistake? Open the Console and, under Server machine at the bottom left, click Create Desktop shortcut.
Reinstalling / upgrading
- CafeServer updates itself — no reinstall is needed for new versions. See CafeServer self-update.
- Running
CafeServer.exeagain on an installed server just makes sure the service is running and opens the Console; your settings are kept.
⚠️ Note: Do not run two copies of CafeServer on one server, and do not install CafeServer on workstations.